Belajar Bahasa Jerman

Leave a comment

Dalam pembelajaran bahasa khususnya bahasa Jerman, terdapat empat keterampilan yang harus dikuasai oleh seseorang pembelajar bahasa Jerman. Keempat keterampilan itu adalah, keterampilan membaca (Lesefertigkeit), berbicara (Sprechfertigkeit), menyimak (Hörfertigkeit), dan menulis (Schreibfertigkeit)
Pada materi ini penulis akan menerangkan sekilas tentang membaca dalam bahasa Jerman. Cara baca kata atau kalimat bahasa Jerman tidaklah sulit seperti bahasa inggris, perancis ataupun bahasa yang lain. Sebagian besar kata atau kalimat bahasa Jerman dibaca sesuai dengan apa yang tertera pada tulisannya. Untuk lebih jelasnya penulis akan menerangkan dan memberikan contoh cara membaca tulisan bahasa Jerman.
Huruf abjad dalam bahasa Jerman
Aa Be Ce De Ee eF Ge Ha Ii Jot Ka eL eM eN Oo Pe Qu eR eS Te Uu Vau We iX Ypsilon Zet Ääa-umlaut Üüu-umlaut Öőo-umlaut βEsZet

Tidak jauh berbeda dengan bahasa Indonesia. Hanya yang berhuruf tebal saja yang berbeda. Itu pun berbeda pengucapan hurufnya, tapi bila sudah ada di dalam kata, bunyinya akan sama dengan bahasa Indonesia
Contoh:
Qualität – dibaca: kualitet
variabel – dibaca: fariabel
Januar – dibaca: Yanuar
Wolf – dibaca: Volf
Zebra – dibaca: Tsebra
Typ – dibaca: tüp (ü lihat penjelasan di bawah)
Tapi ada tambahan huruf lagi dalam bahasa Jerman, yaitu umlaut:
ä (a umlaut), biasa juga ditulis dengan ae
ö (o umlaut), biasa juga ditulis dengan oe
ü (u umlaut), biasa juga ditulis dengan ue
Nah ini yang susah. Susah untuk menuliskan bagaimana ketiga huruf umlaut itu dibaca. Harus mendengar dan melihat langsung. Tapi kira-kira begini:
ä – pengucapannya mirip dengan pengucapan e
ö – pengucapannya antara mengucapkan o dan u (mulutnya mancung ya…)
ü – pengucapannya antara mengucapkan u dan e (mulutnya mancung ya…)
Masih ada satu huruf lagi: ß (eszett). Ini cara membacanya gampang. Jangan panik dulu melihat bentuknya. Membacanya seperti membaca huruf s yang ‘tajam/tebal’ atau double s – ss.
Contoh: Grüßen dibaca: Gruessen.
Lalu ada lagi gabungan beberapa huruf yang sering dipakai dalam bahasa Jerman:
äu – dibaca oi/oy
ch – dibaca kh tebal
ck – dibaca k
ei – dibaca ai
eu – dibaca oi/oy
ie – dibaca i panjang
sp, st – bila diawal kata dibaca dengan s seperti syin atau sh atau sy; bila ditengah dibaca tipis seperti biasa
sch – membacanya juga seperti s pada syin atau sh atau sy.
Masih ada lagi beberapa huruf yang sering ditulis berdekatan. Tapi cara membacanya biasa saja seperti bahasa Indonesia.
Misalnya: Pf dalam Pfau (merak) dibaca Pfau seperti biasa.
Kasus lain:
– pengucapan huruf h. Bila huruf h terdapat di tengah kata, maka h ‘tidak dibaca’, tapi membaca a nya agak panjang aa.
Contoh: Mahnung – dibaca Manung.
– pengucapan huruf s. Bila huruf s diikuti vokal, maka dibaca z.
Contoh: Sonne – dibaca Zonne
– -ig. Bila ig terletak di akhir kata, maka dibaca ih.
Contoh: billig – dibaca billih
Sebetulnya masih ada lagi, yaitu akhiran -en, pada kata kerja bentuk dasar bahasa Jerman. Akhiran -en, ini biasanya diucapkan tak jelas.
Misalnya: machen – dibaca: mach‘n
Demikian dasar-dasar cara membaca satuan terkecil kata dalam bahasa Jerman. Mudah-mudahan tidak ada yang tertinggal.
Satu catatan: Pada kenyataan sehari-hari kerap terdengar ketakpersisan cara membaca/mengucapkan dari orang-orang native Jerman sekalipun. Hal ini dikarenakan- seperti juga pada semua bahasa di dunia- ‘pengucapan bahasa’ atau pronounciation memang bukanlah ilmu pasti. Ia dipengaruhi oleh dialek, tempat/lokasi, dan juga tingkat pendidikan.
Sebagai penutup berikut ada beberapa contoh sekedar untuk melengkapi:
– Michael Schumacher – dibaca: Mikhael Shumakher
– Winter – dibaca: Vinter
– Vogel – dibaca: Fogel
– Läufer – dibaca: Loyfer
– meine – dibaca: maine
– Europa – dibaca: Oyropa
– zurück – dibaca: tsuruek
– Biene – dibaca: Biine
– spät – dibaca: shpet
– Jaguar – dibaca: Yaguar
– Google – dibaca: Google
– Porsche – dibaca: Porsye
– Dr. Seuss – dibaca: Doktor Soyss


Sumber:

Daftar pustaka
Dian Satriana,Ellyza(2007),Cara Membaca Dalam Bahasa Jerman,http://deutschlandisjerman.allespedia.com, 6 Oktober 2009
Afif (2007),Cara Membaca Dalam Bahasa Jerman,http://afifclever.blogspot.com, 6 Oktober 2009

Leave a comment


My first three rulers shapes 
(I will announce the other 2 shapes at a later date)
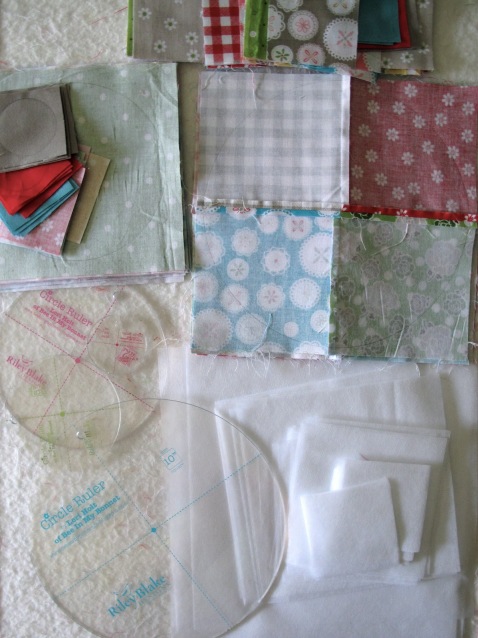
are designed to fit precut fabrics…
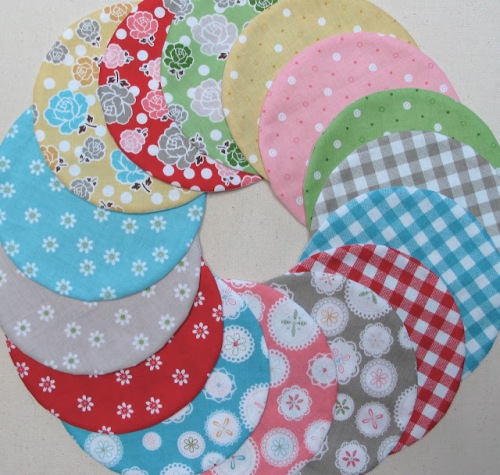
 and the first shape to be released at is the “Circle Ruler”.
These rulers come in 4 different sizes and are sold together as a set.
 
The circles can be used with a rotary cutter but for the project I am doing today…I used them as templates.


The smallest works perfectly with a 2 1/2″ square…making it easy to use with a 2 1/2″ strip of fabric.


Or you can also use the smallest circle ruler to get 4 circles from a 5″ square precut. 


The next size up fits the 5″ square precut too!


The next size fits a 7″ square of fabric…


And the largest size in the set fits a 10″ square!
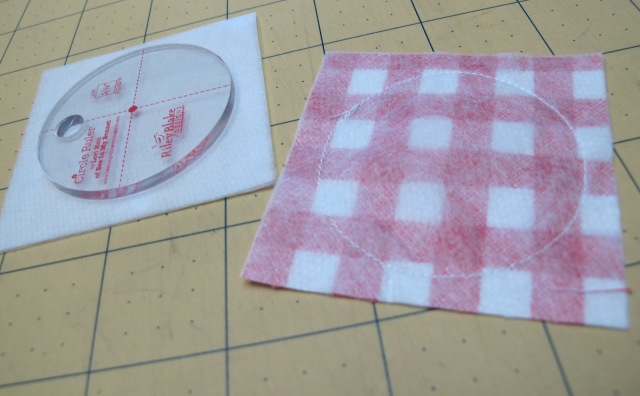
For my new pattern I sewed four 5″ squares together into a 4 patch and then laid my large circle ruler on the back of the block and lined up the marked lines on the ruler with the seam…


And traced around the edge with a mechanical pencil.
 
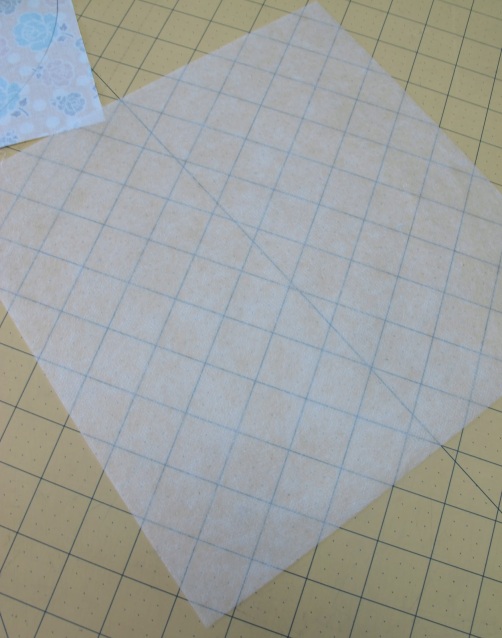
I cut a square of lightweight non-fusible Pellon interfacing….
And pinned my marked 4 patch with the right side onto the Pellon.


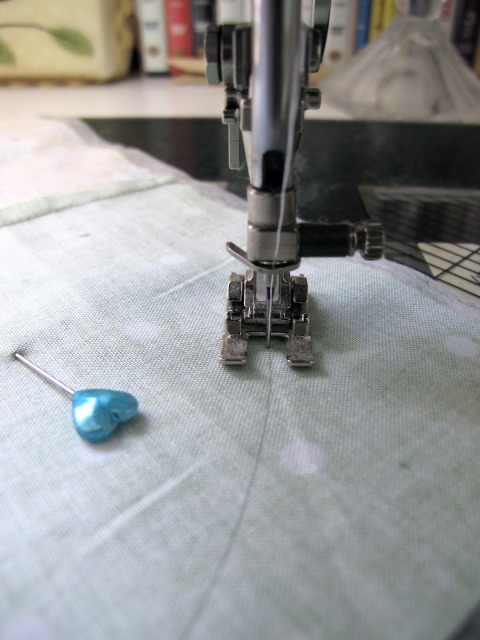
I took it over to my machine and stitched directly onto my marked line…completely around the circle and making sure to backstitch at the beginning and the end.
 
*It helps to use an open toe foot for this so that you can see exactly where your needle is going into the fabric.


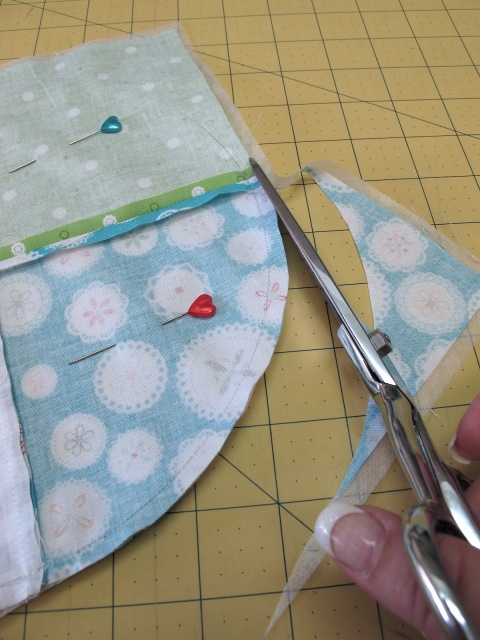
After sewing the circle…I trimmed an approximate 1/4″ seam allowance all the way around…


like this.


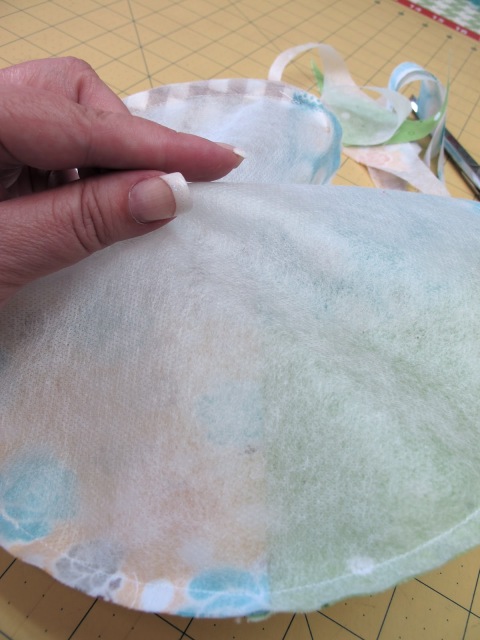
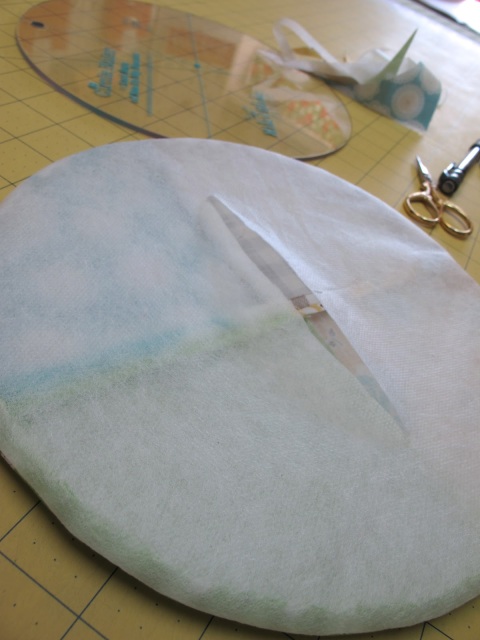
Then I lifted the Pellon away from the circle and cut a slit for turning.
I used scissors for this because they were right there and handy…but a seam ripper works great also.


The slit does not have to be very long…


Just long enough to turn right side out like this.


Smooth the edges and then press flat…


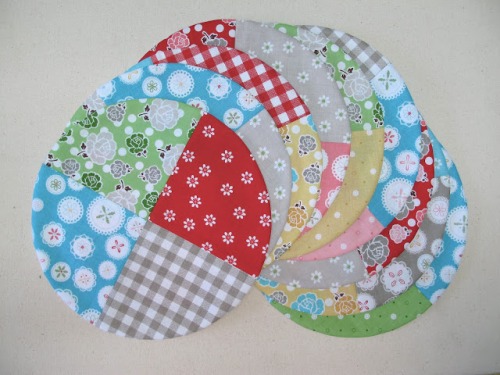
And you have a completed perfectly shaped circle the exact size of the ruler!


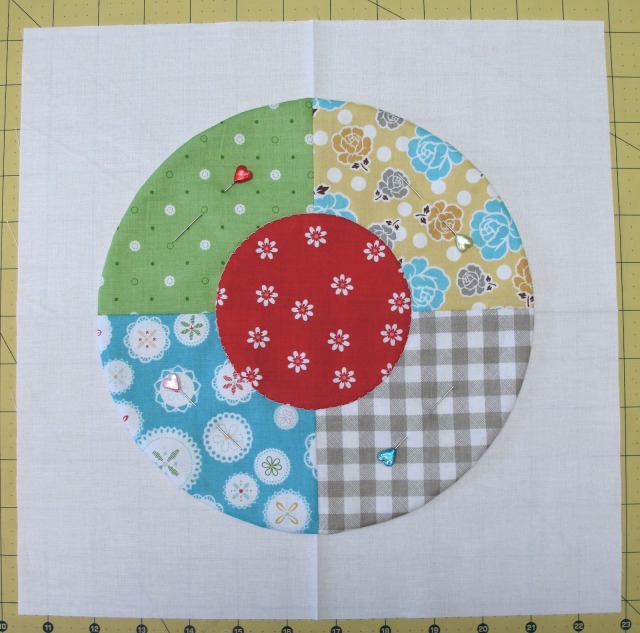
I machine appliqued a prepared smaller circle onto the center of the 4 patch.
Then I pressed a white background square in half both ways to mark the center…
and centered my 4 patch circle on top and pinned it into place…


and machine appliqued the large 4 patch circle to the white square.
 
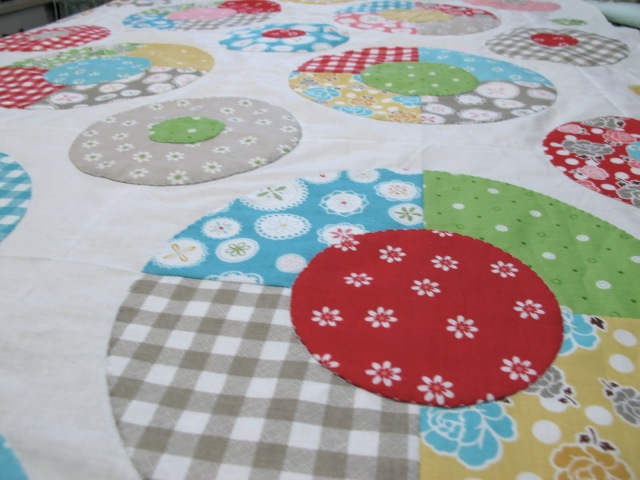
I continued making lots of dots…


Using all 4 sizes of the Circle Rulers…


and using my machine to appliqué.
 

QUILTY PROJECT

Leave a comment

Recently I’ve had several people ask me how I bind my quilts.
So I thought that this would be a perfect time to show you how I do it:)
 
 
Yesterday I made a quilt for Dolly and I took pics of my machine quilting and binding process.
It’s the same way that I bind every quilt or project…no matter the size.
 
I’m no stranger to hand quilting…
I grew up around the quilting frames.
But because of my design schedule…
I usually send my quilts out to be machine quilted.
That seems to be the norm now a days and
 I do love me a beautiful machine quilted quilt!


When I have smaller projects such as my new Dolly quilt…
I simply quilt them on my Bernina.
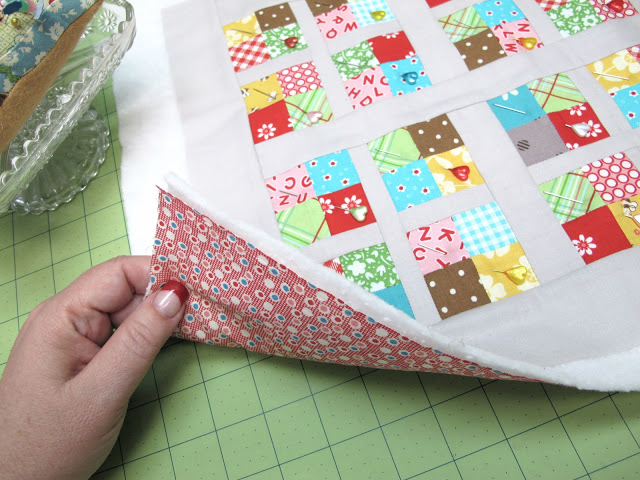
I cut my backing fabric a few inches larger than my quilt top…
around all 4 sides.
 I cut my batting the same size as my backing fabric.


I ALWAYS use a walking foot when I am machine quilting. 
A walking foot allows the top, middle and bottom layer of the quilt
 to feed through the machine at the same speed…
so that means no shifting… gathering or puckers when quilting.
Nice!!! 


After I have finished my quilting…
 
 
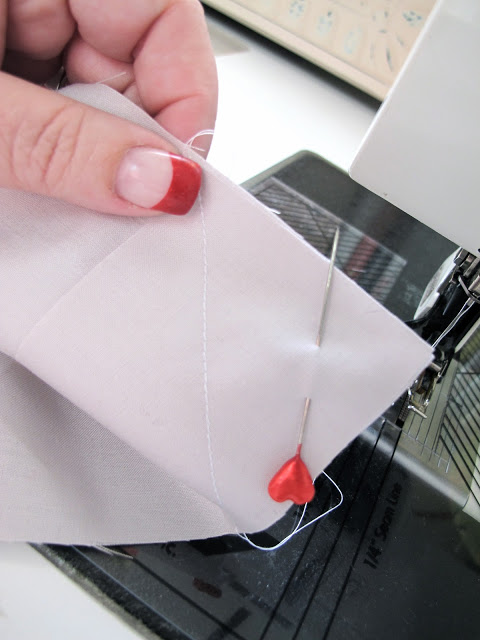
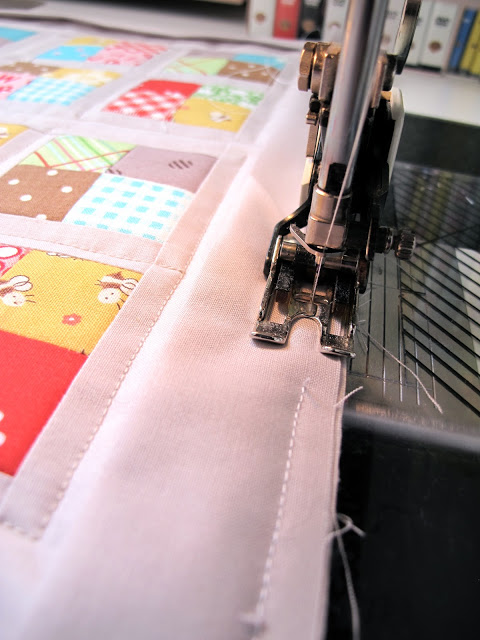
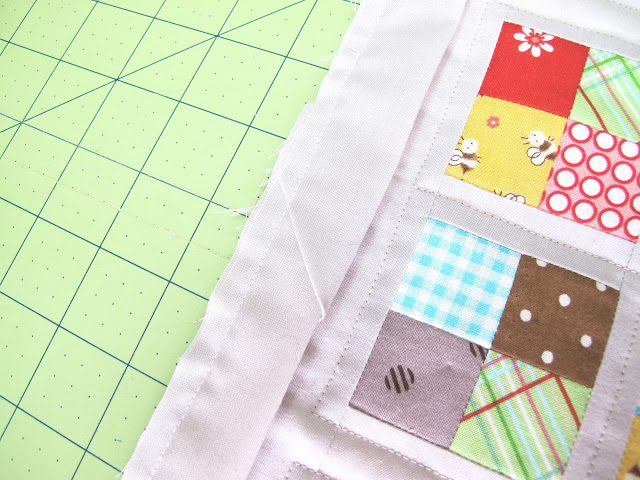
I quilt 1/8″ from the edge to hold it down nice and flat for binding…
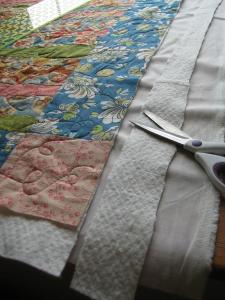
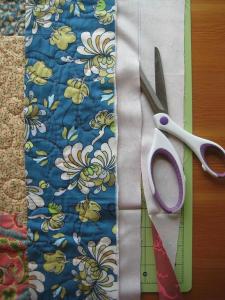
then I trim the excess batting and backing fabric away.


Sometimes I like to add trim in my bindings.
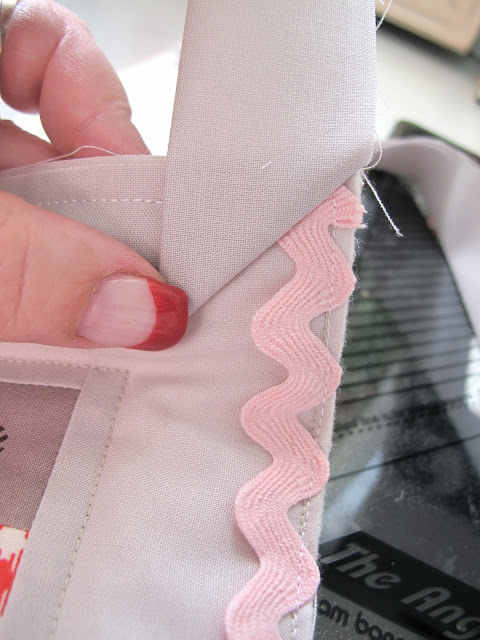
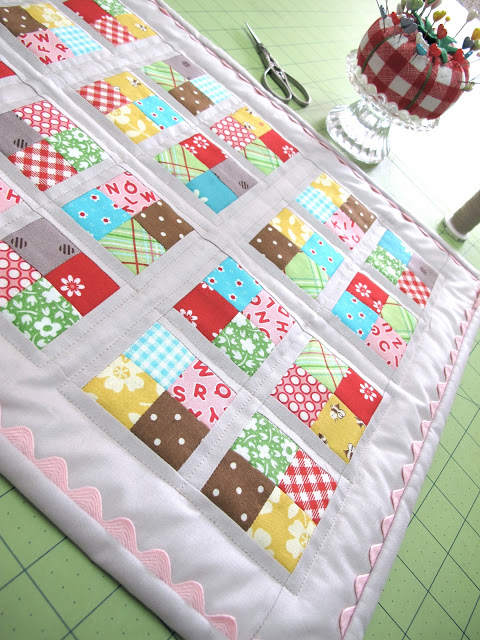
For the Dolly quilt…I sewed 1/2″ pink ric-rac on the edge.
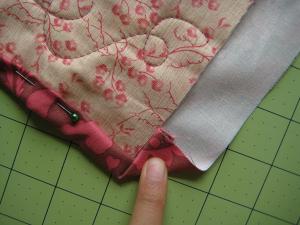
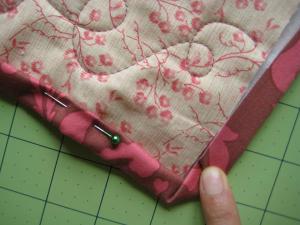
I fold the rid-rac like this on each corner and if there is any 
ric-rac sticking out past the edges of the quilt…
I simply trim it off. 
Don’t worry about those trimmed off edges fraying…
they will be within the binding:)


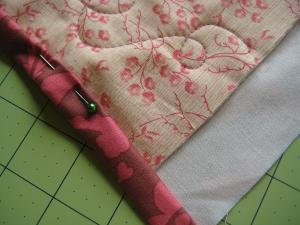
When I take my 1/4″ seam allowance with the binding..it will look like this.


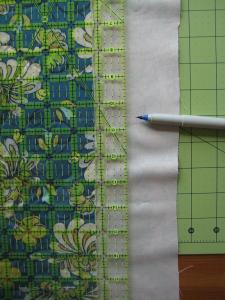
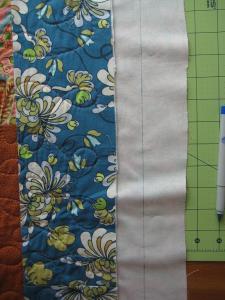
I cut two 2 1/2″ x Width of Fabric strips for the binding.
For this quilt I will need about 80″ of binding.
 
My formula for determining how many inches I need for a quilt goes like this.
1. Measure the length of all 4 sides of your quilt top.
2. Add them together.
3. Add 10″…
4. That is how many inches you will need!
 
*NOTE – if you are binding anything that has a curve at all to it…
you will need to cut your strips on the bias!!!


I cut the selvedge off of each strip….


And join them together on the diagonal…


like this.


I trim off the excess…


And press the seams open for less bulk around the edge of the quilt.


Then I press the whole strip in half with WRONG SIDES together.


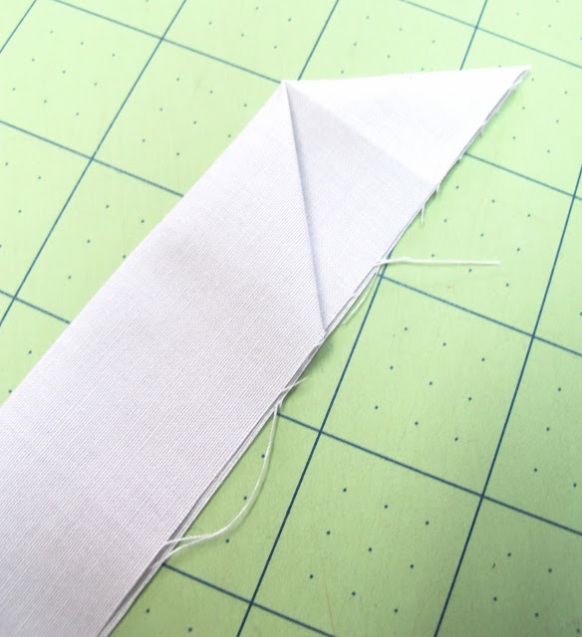
I unfold one end and fold it down like this…


And then fold it back to wrong sides together.
 
 
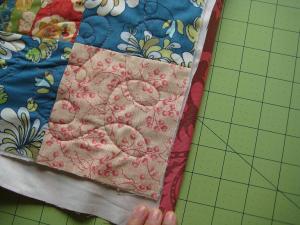
I place the raw unfolded edges even with the edges of the quilt….
the fold goes towards the inside of the quilt top.
I start by sewing the end I have folded like this….
 and I leave a tail by stitching about 2″ down from my fold.


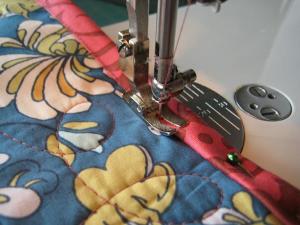
I use a 1/4″ seam allowance and 
I always use my walking foot when sewing on binding to keep the layers even.
I keep sewing until I am 1/4″ from the first corner.
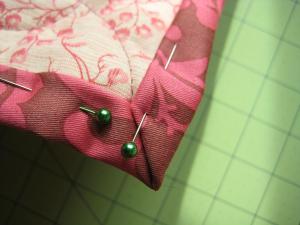
I lift the foot up …leaving the needle down and pivot the quilt on an angle like this.


Then I sew at an angle off the edge of the corner and clip my threads.
I DO NOT CUT MY BINDING STRIP AT ANYTIME.
 
 
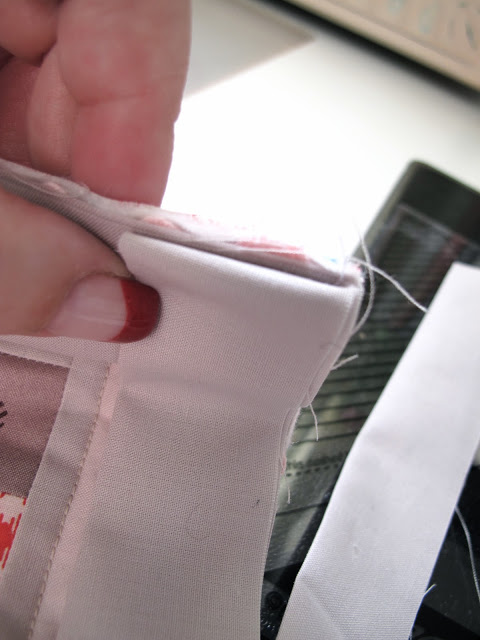
Then I lift the binding straight up…


And fold it back down like this.


The raw edges are even with the side of the quilt again
 and I’m ready to sew the binding on the next side of the quilt.


When starting on a new side…
I simply start at the top…
sewing through the folded corner and backstitch at the beginning to secure.


I continue sewing all 4 sides of the quilt and do each corner exactly the same as the first one.
 
 
When I get back to the side where I started…
I trim the end on the diagonal …


Making sure that I leave it long enough so that I can 
unfold the folded tail at the beginning and tuck it inside…


like this.


Then I simply continue sewing until I reach my first stitches…


Then I sew on top of them about 1/2″ and backstitch.
By tucking the raw edge inside the folded end that I started with…
I have a completely finished seam!


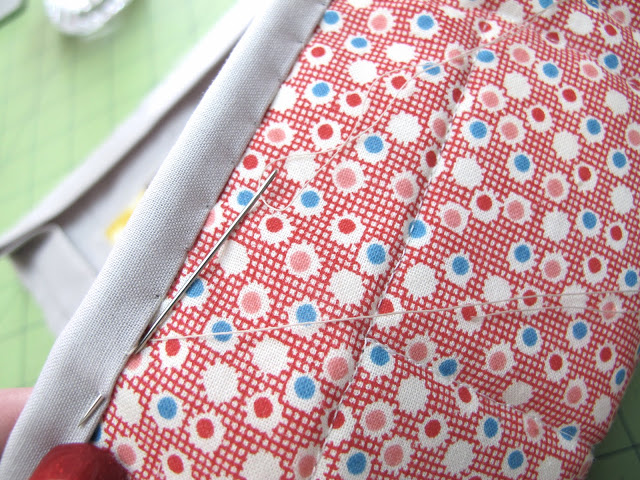
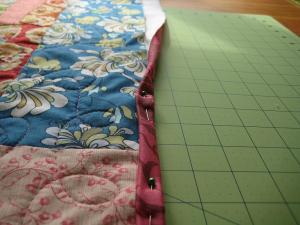
Then I fold the binding to the back of the quilt and whip stitch it into place.
 
 
I always start my hand stitching where I started my machine stitching.


I do a blind whip stitch…


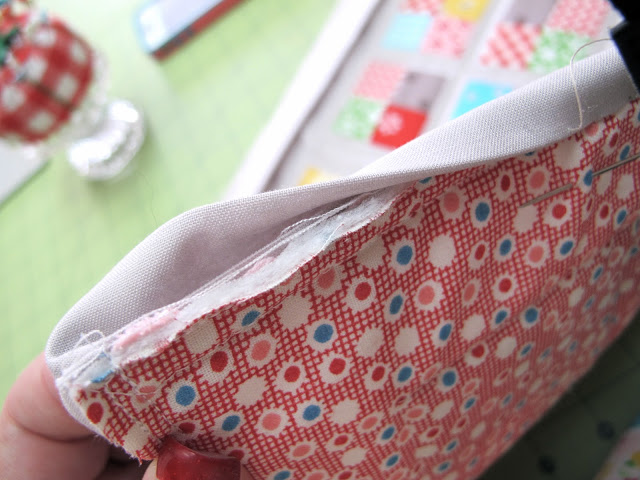
and I fold the binding just past the 1/4″ seam line on the back.


When I get to the corners I fold them over to the back and sew just to the machine stitching.


Then I fold the other side in just past the stitching and
 stitch them together with 2-3 stitches…like this.
I continue in the same way all the way around…


Until I get to my first fold in the binding. I also do a blind whip stitch to hold it down and the I knot off.
I hide my tail between the layers and trim…just like when hand quilting.


And my Dolly quilt is completely bound.


 SUMBER:http://beeinmybonnetco.blogspot.com 

Patchwork Bag

Leave a comment

Tutorial: Reversible Patchwork Bag

step25.jpg
Something I’ve wanted to do really bad… A new sewing tutorial!!

It really makes me happy that you guys enjoyed my sewing tutorials
and made beautiful fabric baskets, camera cases, and pen cases.
My finding is that you like easy & quick projects like I do!
How about this reversible patchwork bags that are easy and quick
to make and can be lovely little handmade gifts?

step1.jpg
Cut out 32 of 2 1/2″ squares. (I used 16 different kinds of
fabric, 2 squares from each different fabric)

step2
Arrange to make 2 sets of 16 x 16 top layers.

step3
Sew each row consisting of 4 squares.
(Seam allowance: 1/4″ throughout the process unless otherwise indicated)

step4
4 rows completed!

step5
Press seams to one direction, making sure ones next to each other
are pressed to opposite directions.

step6
Now let’s sew all the 4 rows together.

step7
Press seam open.

step8
Do the same for the rest of 16 squares and now
you have 2 patchwork tops complete!

step9
Sew them right sides together.

step10
Cut out the bottom 2 corners.

step11
Turn the bag out. Yeah! This is a fun part!

step12
Cut out 2 pieces measuring 8 3/4″ x 1 1/2″.
These will be casing for cords.

step13
Fold the edges like this. Fold 1/4″, press, fold 1/4″ again, press.

step14
Fold the pieces in middle, wrong sides together and press.

step15
Sew them onto the top part of the patchwork bag like this.
(Sew very close to the edges.)

step16
Cut out 2 squares measuring 8 1/2″ x 8 1/2″.
This will be a reversed version of the bag, so pick cute one!

step17
Sew them right sides together, leaving an opening in the bottom.
Cut the two bottom corners like you did with the outer bag.

step18

Place the lining inside the outer bag, right sides together.
Sew the top edge so that the lining is attached to the outer bag.

step19
Turn the bag right side out through the lining opening.
Then, press the top edge of the bag. Hand-stitch opening closed.

step20
Prepare two 22″ long craft cords. (can be found at Michael’s)
Thread one cord through casing and knot ends together.
Thread second cord from a different casing opening and do the same.


Tutorial: Patchwork Wristlet


Patchwork Wristlet

Thank you to many of you who requested
a tutorial on this pouch. This wristlet,
measuring approximately 6 3/4″ x 5″,
has some fun features including three inside
pockets for cards and a chap stick and a little
loop outside the pouch that holds a key chain.
I have been making tons of these pouches just
because this project is simple, easy, quick, fun,
and quite addictive, so I hope you enjoy this tutorial.

t1

We start off with twenty four 2 1/4″ squares.
(Once again, seam allowance of 1/4″ is
included unless otherwise noted.)
Twelve of them will be one side, and
the other twelve go to the back side.

t2

We now take the twelve squares that come to
one side of the pouch. Then we’ll make
patchwork strips of columns.

t3

Fun 😉

t4

After you have four strips, it’s time to press.

t5

Pressing seam allowances like this will make
your finished patchwork piece less bulky and
it helps to ensure that each corner of a square
piece matches with corners of other squares around it.

t6

We’ll sew them together.

t7

Then press seams open! Yay just like you
did for the fabric basket and the patchwork
drawstring bag
! I sure love square patches 😀

t8

After repeating the same process with the rest of
twelve squares, we have two patchwork panels.

t18

Then we’ll fuse each of them onto a piece
of medium to heavy weight batting. I like
to use quilting spray for this process
rather than using fusible batting.

t19

The quilting style here is totally up to you.
Zig-Zag stitching is fun and quick, but
what I’ve been doing is this; quilting
very close to both sides of each seam,
and the short edges..

t20

like that.

t21

Then we cut off the excess.
Fun part 😉

t22

Now let’s move onto making a handle.
We need two strips; one linen piece
and one cotton piece. If you’d rather
use cotton for both two strips, I
recommend that you use interfacing.
(Just like how the handles for the
lunch bag
 are made.)

t23

Once again, this is just like making
handles for the lunch bag and
the fabric basket.

t24

Folding each long edge toward the middle..

t25

Then top-stitching both long edges.

t26

If you want to attach a loop for your
pouch, cut out one rectangle piece
measuring 1″ x 4″.

t27

Just like the handle, we fold and
press this piece like this and..

t28

top-stitch both long edges.

t29

We will now machine-baste the handle
and the loop you made onto one of
the patchwork panel close to the
top right corner like this.

t9

Now let’s work on the lining. We need
two pieces for the lining and one piece
for three pockets.

t10

Take the pocket piece, fold it in half
with right side together, and sew the
one long edge together.

t11

So your pocket looks like this.
Not so cute, so let’s turn it inside out.

t12

And press. That’s much better 😀

t13

Now take a ruler and one of the lining pieces
to attach a pocket onto. I like to leave
about 1 1/4″ above the pocket.

t14

Then sew the bottom edge of the pocket

t15

so it looks like this now.

t16

Using a water soluble pen, draw these lines.
The two pockets on the left are going to
be for your cards and one on the right is
for your chap stick, if you like to carry one.

t17

In this image, there is no sewing done at the
short edges of the pockets, but I recommend
you sew very close to those edges just so that
you’ll deal with less pins later.

t30

Let’s now attach a 7″ zipper. I know that
dealing with a zipper is a bit intimidating
for a beginner, (I used to be terrified at this
too) but it is actually not that hard. Trust me.
After attaching a zipper in several different
ways, I found this way the easiest, so if you
are a beginner, I hope you’ll follow this
step-by-step instruction 😉

Oh and I have to tell you that Zipit is a great place to
get zippers! The owner Jennie is extremely
nice and generous and her zippers are just
the best! Fastest shipping too 😀
I don’t think I’d ever buy zippers from
anywhere else. yeah, that’s how much
I’m in love with the shop, hehe.

t31

So here, I make sure that there is more than
1/4″ from the left edge of the lining piece to
the metal part of the zipper. This way, we can
avoid sewing onto the metal, which will break
your needle instantaneously. (Don’t ask me how
many needles I have broken this way, lol)

t32

Remember to use a zipper foot that probably came
with your sewing machine that should look like
this one in the image above. With a zipper foot,
start sewing from the end of the zipper.
Here, your zipper is completely closed.

t33

Stop, once you sewed it half-way and lift
up your zipper foot.

t34

And bring the zipper-head to the very end,
lift down the foot again, and keep sewing.
I’ve found that it is very important to always
have the zipper-head very far from where I am
sewing. It is quite difficult to keep stitching
straight if a zipper-head is near the foot.
I do this moving-zipper-head for every single
piece I attach to a zipper.

t35

With the zipper completely closed,
we’ll attach another lining piece onto the
zipper. This time, we can’t really see a zipper,
but as long as you can make sure that the piece
is aligning with the zipper, it’s totally fine.
Oh and don’t forget to move the zipper-head
when you sewed it half-way just like you did
for the other lining. (I hope I am not annoying
you by repeating this, lol, it’s just so
helpful to do it that I can’t stress enough.)

t36

When both lining pieces are attached to the
zipper, it looks like this. Nice 🙂

t37

Take a patchwork piece that has a handle
and a loop attached. We are sewing
this onto the zipper now.

t38

Like that.

t39

This is how it should look like.
Now we will attach the other patchwork piece.

t40

This time, it’s a little different, because
we start off with the zipper completely open.
Then when we come to half-way, we close up
the zipper to keep sewing.

t41

After all the pieces are attached,
it should look like this.

t43

This is optional, but you might want to sew
the top of the lining just to make sure it
won’t be too puffy and in your way when you
open the pouch. Here we want to make sure that
in this process, we don’t have our patchwork
panel underneath the lining piece being sewn.

t44

With right sides together, pin both patchwork
panels together and do the same for the lining.Make sure to fold your handle insideand to have your zipper about 80% open.Sew the dotted line, with at least 2.5″opening at the bottom of the lining.

t45

Cut off corners and excess,
and flip it inside out from the opening.

t46

Hand-stitch the opening closed will complete
your wristlet with these three pockets 😉

t47

How about adding a key chain here..?

Patchwork Wristletsumber : http://ayumills.blogspot.com

Leave a comment

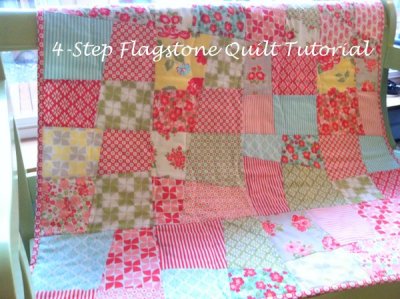
Four-step Flagstone Quilt Tutorial

Hey everyone! It’s Jera from Quilting In The Rain bringing you this fun quilt top that you can finish in a weekend. Grab a Layer Cake and get this done within a few hours. Check out our 4-step tutorial below on how to do it.

And don’t forget… if you need help finishing your quilt, stop by the Stitch and Sew Studio for some one on one help, or stay tuned for our demo nights. Enjoy!

Materials for a ~36.5″ x 45.5″ finished quilt top:

  • 20 pre-cut 10 inch squares (one Layer Cake comes with about 42 squares)
  • Thread

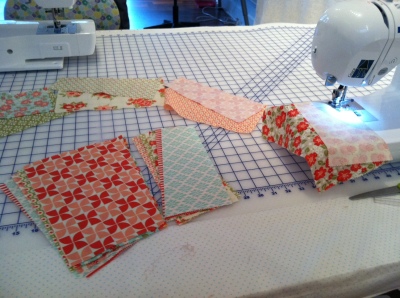
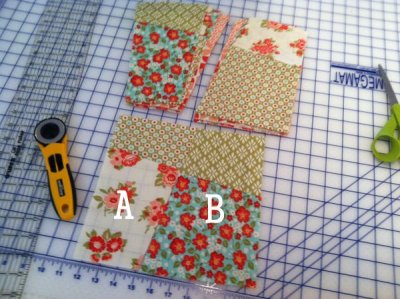
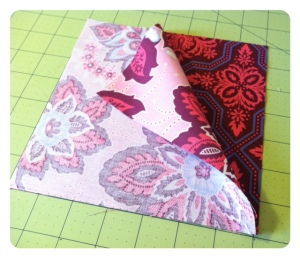
Step 1 – Choose ten pre-cut 10 inch squares and lay them directly on top of one another making sure they are aligned. Using a ruler and rotary cutter, make a diagonal cut through all ten layers. Make sure the cut is similar to the one shown below (i.e. don’t make the cut too slanted).

After you make the diagonal cut, you will have two stacks of fabric: Stack A and stack B.

Step 2 –  From stack A, take the bottom piece and from stack B take the top piece. Place them together as shown below. Piece these two pieces together (with right sides facing together, sew a 1/4″ seam allowance). Repeat until stack A and B are all pieced together.

Tip: For faster piecing, you can chain piece:

Step 3 –  After you’ve completed Step 2, press open all of the blocks using an iron. Next, stack all of your blocks on top of one another, same as you did in Step 1. Make sure all the blocks are facing the same direction and are aligned. Rotate the stack and then make a diagonal cut again, as shown below.  Once again, you will have stacks A and B.

Repeat Step 2 with stacks A and B:

After sewing together, press open with an iron. A finished block will look like this:

Repeat steps one through three with ten more pre-cut ten inch squares so that you will yield a total of 20 finished blocks.
Step 4 –  Lay all 20 finished blocks in a 4×5 formation as shown below. To piece the quilt top together, first sew all four blocks together in each row, and then sew each row together. (Using a 1/4″ seam allowance, sew with the right sides facing each other, and then press open with an iron).
OUR  EASY  RAG  QUILT  TUTORIAL

Step 1 

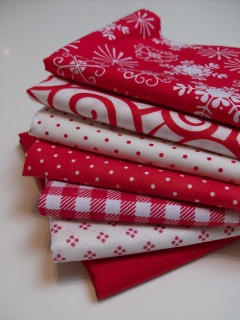
Picking out your fabric.-Try to pick quality fabric, the last thing you want is to go to all this work to have your fabric fall apart after a few washes. For this Tutorial I’m using Backyard Baby from Michael Miller and Moda’s dottie collection.

-When selecting your fabrics try to have between 7-9 coordinating fabrics. If you are making a smaller quilt it’s nice to use smaller prints that will read well in smaller squares.

-Choose a backing fabric at the same time, Flannel or Minky are my personal favorites but you could also use Fleece or quilting cotton. If your backing fabric is thin you will want to purchase batting to put in between the two layers. (Batting would need to be cut 1″ smaller than your front and back fabrics)

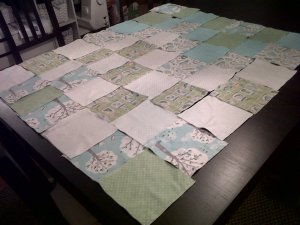
Step 2 – Sizing and Preparing
-Determine the size of your quilt, 6-8 inch squares are the perfect size. 6″ for baby quilts & 8″ for lap quilts – for a bedspread you could even go as high as 10″.
-Cut both the front and back pieces into equal squares. Remember, if you are putting batting in between cut it 1″ less so that it will fit perfectly. i.e. if your front and back squares are 6″ your batting should be 5″ squares.

Step 3 – Assemble your squares
-Pair your front and your back together, ugly sides facing each other.
-Sew a perfect X, corner to corner on each of your squares.
-If using batting (not seen in this tutorial) place the batting, one inch smaller, inside before sewing the X.

Step 4 – Quilt Layout-Lay out your quilt and arrange it to look exactly the way you’d like it to look when it’s completed. Sometimes this takes a while, but don’t over think it, just have fun with the designs. Random or in a pattern – it will look great.

Step 5 – Sew your Rows together– Facing two squares together, backing touching/pretty sides out, sew them together at 3/8″ – 1/2″allowance. If your quilt is smaller go with a smaller allowance, bigger quilts look good with a bigger allowance.Just make sure your allowance is consistant throughout the quilt.

This is what your essembled quilt squares should look like.

– Are the pretty sides facing up?
– Is the seam also facing up?
– Now continue to essemble your full row the same way.

– Double Check that all of your completed rows are straight and are in the pattern you had originally intended before sewing the long rows together.

-This is a great time to make sure that the rows are almost perfectly the same size. If they are slightly – don’t worry – it will still look great. I’ll show you how to clean it up at the end.

Step 6 – Essemble Long Rows
– Sew one full row with it’s neighboring row, again, backing sides together and pretty sides out. The seam allowance should be on the front of the quilt.

Step 7 – Correct your mistakes & Sew Perimeter-When you’ve completed sewing your long rows together you may find that their are rows that are slightly longer than others, simple trim them up to make a straight line.
– After trimming the edges, sew the perimeter of the quilt with a running stitch at the same seam allowance you’ve been using.

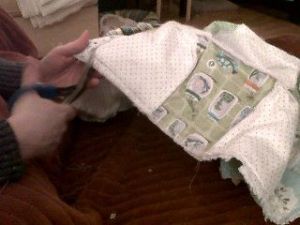
Step 8 – Clipping & Snipping
– Clip and Snip EVERY seam allowance and the perimeter. Be very careful not to cut your running stitch.
– The closer you clip and snip the more raggidy your quilt will look. I prefer to use an angled scissor but there are spring loaded rag quilt scissors and fringe scissors that are wonderful too.

Step 9 – The Magical Step. Wash, Dry and Enjoy-Your final step is to Wash & Dry your rag quilt. This step is like magic, your quilt goes into the machine looking disheveled and uninspring. When it comes out of the dryer it looks beautiful, fluffy and cozy. The more you wash it the cozier it looks.

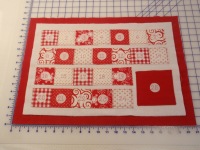
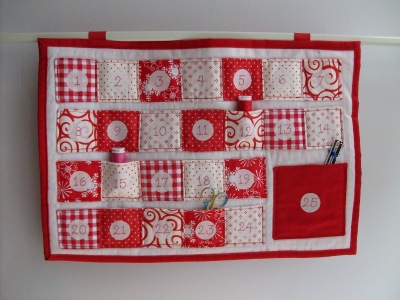
Quilted Advent Calendar

Finished size: 14″ x 20″
Pocket size: approx. 2″ square, large pocket approx. 4 1/2″ square

For this project you will need:

  • Permanent Fabric Marker
  • Steam-a-Steam (or other double sided fusible interfacing)
  • 6-inches coordinating ribbon (~1″ wide)

Assorted Fabrics:

  • (24) 3″ squares, for the small pockets
  • (1) 5″ square, for the large pocket

White Fabric:

  • (2) 3″ x 18″ strips, for lining the 2 longest pockets
  • (2) 3″ x 13″ strips, for lining the 2 shorter pockets
  • (1) 5″ square, for ling the square pocket
  • (1) approx. 10″ square, for making number circles
  • (1) 13″ x 19″ rectangle, for the front
Backing Fabric (will also be folded over to create binding on the front):
  • (1) approx. 15″ x 21″ rectangle (a fat quarter could work)
Fusible Fleece:
  • (1) 13″ x 19″ rectangle (or a larger piece of quilt batting)
PART 1: Making the Pockets

Arrange your squares into two rows of 7 and two rows of 5.

Sew the rows together using a 1/4″ seam allowance.

Press the seams open.

Lay the strips of white on top of your rows with the right side of the colored fabric against the white.

Stitch around each row 1/4″ from the edge.  Leave a gap so that you can turn it inside out.

Clip the corners (not too close to your stitching) and turn the pocket inside out.  Get the corners as pointed as you can, but don’t fuss over them too much.

Press again.

Top stitch all the way around the pockets, close to the edge.

Repeat the same steps to complete the 5″ square pocket.

 
Part 2: Making the Numbers
 
This part doesn’t involve sewing.   So if you have a helper who you can trust with a pair of scissors and an iron, you could outsource this part of the project.

I traced small circles onto my white fabric using a regular pencil.  I discovered that tracing my spool of thread created a nice circle, slightly larger than 1″.

Print out the numbers 1 through 25 in a stylish font and then trace them onto your white fabric with a permanent fabric marker.

Heat set the ink, following the directions on the fabric marker packaging.

Peel off one side of the steam-a-seam and place the fabric on top.

Cut out the circles inside the pencil marks.

Peel off the other side of the Steam-a-Seam and place numbers onto the squares.

Adhere the numbers following the directions on the Steam-a-Seam packaging.

Part 3: Putting it Together

If you are using fusible fleece, fuse it to your front white fabric first following the directions on the packaging.

If you are using batting, you’ll want it to be several inches larger than your front fabric on each side.  Don’t trim until after everything is sewn together.

Make a “quilt sandwich” with backing on the bottom, fusible fleece (or batting) in the middle, and front fabric on top. Arrange the pockets on the very top and pin everything together.  (Use lots of pins!)

Switch the foot of your sewing machine to a walking foot, if you have one.  It will help keep all the layers of fabric from shifting.

Begin stitching in the top corner of each pocket and stitch down the side.  Lift the pressure foot and rotate the fabric 90 degrees.  Lower the pressure foot and continue stitching along the bottom of the pocket.

Before you reach the seam between the squares, rotate 90 degrees and
go up to make a pocket divide.  When you reach the top of the pocket, rotate 90 degrees and make a few stitches along the top of the pocket.

Rotate and stitch down the pocket again.  Continue in this manner until your reach the end of the pocket.

Repeat for the remaining pockets.

If you used batting instead of fusible fleece, now is the time to trim it to the size of the front fabric.

Trim the backing fabric to 1″ beyond the front on each side.

Following Jera’s instructions for Quick Quilt Binding, fold the edge of the backing over onto the front and pin in place.

Top stitch close to the folded edge.

For hanging:  Cut two 3″ long pieces of ribbon.  Fold each piece in half lengthwise and sew the ends together.  Turn inside out and pin to the back of the calendar, as shown.  Stitch in place.
That’s it.  You’re done!
Now you can fill the pockets with toys, treats, or little notes and start counting down to Christmas day.
Happy Holidays & Happy Stitching!!

Sumber:http://blog.westseattlefabriccompany.com

Leave a comment


Heirloom Quilt Tutorial – and kits!


Recall this quilt I was working on? I finally finished it! This one went to my Grandma in the Philippines as a gift for her 50th wedding anniversary. 🙂

It’s a simple quilt that doesn’t require that many materials. If you use the right prints, it’ll turn out looking more intricate than it really is! I used the Heirloom collection by Joel Dewberry.

If you like it, we have Heirloom quilt kits available at our shop. The kits come with all the fabric you need to make this quilt (even backing and binding fabric). Enjoy the tutorial below! Only five simple steps.

Materials for one 35″ x 46.5″ quilt:

  • 8 fat quarters (or 8 quarter yard cuts)
  • 1.5 yards backing fabric
  • 1/2 yard binding

OR

Step 1 – From each fat quarter, cut three 7 inch squares (save the remaining scraps for step 4). This will give you a total of twenty-four 7 inch squares. For quicker cuts, stack your fabrics 2-3 at a time, press with an iron to help keep in place, and then cut.

Then, pair your fabric prints:

Step 2 – Choose a fabric pair to start with, and place one square directly on top of the another, with right sides facing together.
With a rotary cutter and ruler, make a diagonal cut as shown below. This will give you two half square triangles. Then, sew a 1/4″ seam allowance along each edge where you made the cut.
Press open with an iron, yielding two half triangle squares:
Then, make a diagonal cut on both half triangle squares as shown below. This will yield four triangles:
Switch the triangles around so that opposite prints are adjacent to one another. With right sides facing together, sew the half square triangles together using a 1/4″ seam allowance. Press open with an iron:
Step 3 – Repeat step 2 for all remaining pairs that you sorted from step 1. This will yield a total of 24 of these ‘x’ blocks (six stacks of each pair).
Step 4 – From your remaining eight fat quarter scraps, cut three 6 1/4 inch squares from each. This will yield a total of twenty-four 6 1/4 inch squares.

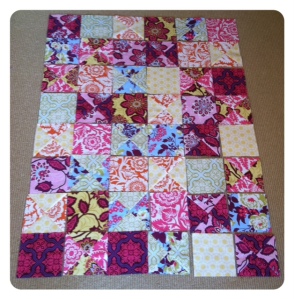
Step 5 – At this point, you should have a total of twenty-four ‘x’ blocks from steps 2-3, and twenty-four plain blocks from step 4, for a total of forty-eight blocks. Rearrange all forty-eight blocks in alternating order with 6 blocks per row and a total of 8 rows, as shown below. (click image to enlarge)

 Sumber: http://beeinmybonnetco.blogspot.com/


Quick Quilt Binding

 
Quick Quilt Binding - Quilting Tutorials and Fabric Creations - Quilting in the Rain
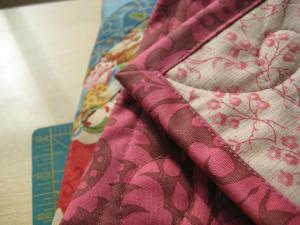
Binding your quilt is the LAST step in creating a quilt! There are several ways to bind a quilt, and this is one of the FASTEST ways because there is no blind stitching (by hand) involved. Also, in this method you don’t need to cut and prepare binding strips. Instead, extra fabric from the back of your quilt will be folded around to the front of your quilt top and fastened by sewing a straight stitch with your sewing machine. You will need about 1.5 inches of extra backing fabric around the perimeter of your quilt top.

Below is a quick and simple 5-step binding tutorial:

Step 1
As shown below, cut any excess batting material from your quilt sandwich (FYI for any newbie’s, a quilt sandwich consists of the quilt top, batting, and backing fabric in that order – batting is the fluffy stuff sandwiched between the quilt top and backing fabric).
Quick Quilt Binding - Quilting Tutorials and Fabric Creations - Quilting in the Rain

Step 2
Using a ruler and marker, mark 1.25 inches on the backing fabric around the perimeter of your quilt top (shown below).

Quick Quilt Binding - Quilting Tutorials and Fabric Creations - Quilting in the Rain


Quick Quilt Binding - Quilting Tutorials and Fabric Creations - Quilting in the Rain


Step 3
As shown below, use fabric scissors to cut along the line you marked from Step 2. This will result in 1.25 inches of backing fabric around the perimeter of your quilt top.
Quick Quilt Binding - Quilting Tutorials and Fabric Creations - Quilting in the Rain

Step 4
Fold the backing fabric in half lengthwise (shown in 1st picture below). Next, fold that over onto your quilt top and pin to keep in place (shown in 2nd picture below). Do this around your entire quilt. I placed pins every couple of inches.

Quick Quilt Binding - Quilting Tutorials and Fabric Creations - Quilting in the Rain


Quick Quilt Binding - Quilting Tutorials and Fabric Creations - Quilting in the Rain


When you get to the corners, follow steps 1 and 2 (below) for folding and pinning all corners:

  1. Fold the corner over so the edge of the binding is aligned with the quilt top.
    Quick Quilt Binding - Quilting Tutorials and Fabric Creations - Quilting in the Rain


    Quick Quilt Binding - Quilting Tutorials and Fabric Creations - Quilting in the Rain


  2. With the corner folded over, fold the backing fabric in half lengthwise. Then, fold that over onto your quilt top and pin in place.
    Quick Quilt Binding - Quilting Tutorials and Fabric Creations - Quilting in the Rain Quick Quilt Binding - Quilting Tutorials and Fabric Creations - Quilting in the Rain

Step 5
As shown below, sew a straight stitch along the edge of the folded binding. Remove the pins as you sew. You can also sew a zig-zag stitch instead of the straight stitch.

Quick Quilt Binding - Quilting Tutorials and Fabric Creations - Quilting in the Rain


  Sumber: http://beeinmybonnetco.blogspot.com/

Leave a comment


TUTORIAL KANZASHI

Leave a comment

They are quite simple to make and after you’ve done a few you could find yourself quite addicted…

How to Make Japanese “Kanzashi” Style Flower Brooches

What you’ll need;
  • A small piece of fabric, about 5 x 25cm is a good place to start.  It’s good to use a fabric with a bit of substance to it, but not too thick.  I used interfaced kimono silks but a starched cotton also works really well.
  • Hand sewing needle, thread, scissors.
  • Five pegs (just from the washing line)
  • Bead and bead caps (optional)
  • Small piece of felt
  • Craft glue
  • Brooch back


Got your bits and bobs?  Let’s get started shall we?
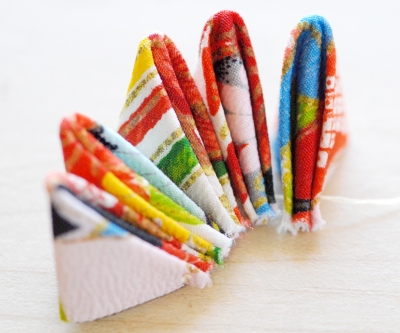
1.  Take the piece of fabric and cut it so that you have five squares the same size.  About 5cm is a good place to start.  Your final flower will be about the same size as one of those squares.
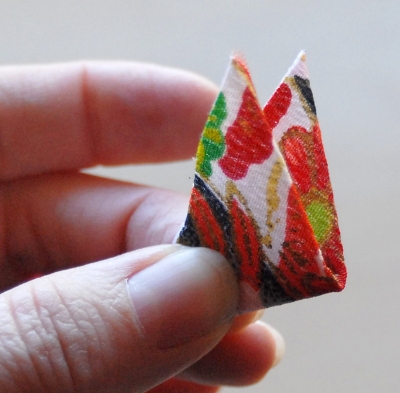
2.  Take one of your squares and fold it in half to create a triangle with the right side facing out.  Give the fold a bit of a finger press.  Fold that in half again, so that the triangle is half the size.  At one corner, the fabric will have two loose points.
3.  Take one of these points and fold it backwards so that you keep the raw edges together.


4.  Take the other loose corner and fold it back on the other side so that it looks like the picture below.  You’ve folded your first petal.  Put a peg on it to hold it in place.


5.  Repeat this until you have five petals.
6.  At the corner where you have the three points meet, very carefully trim a couple of millimetres.  This is going to be the centre of your flower and the trimming helps them sit a little neater.
7.  Take one petal and stay stitch in close to the corner.  A little thread sitting on the raw edge will also help keep everything together.


8.  Making sure that it is facing the same way up, thread the next petal onto the cotton and stay stitch the second petal.  You won’t be stitching the petals together just yet, but it’s a bit like stringing beads onto a line.
9.  Continue until you have all five petals on the thread.  Line them up.


10.  From the line, take the outside edges of the first and last petal and hold them together.  Flip the flower over so that your raw edges are facing upwards.  This is where you want all your stitches to go.


11.  Stay stitch the two together very close to their corners.


12.  Then again about 2/3 of the way up.  You could do neat little stitches all of the way, but as this will be covered by felt later, I don’t bother.


13. Then, with your first and last petals joined, grab the next two folds – what will be outer folds of the first and second.  Scroll down to a couple of photos down and you should get what I mean.
14.  Stay stitch in the centre again, and then 2/3 of the way up.  Don’t worry that the stitching may be a little messy at this stage, it will be covered up later.


15.  Continue until all five petals are joined.  In the photo below you can get an idea of what the stitching will look like.


16.  This is my favourite bit… flip the flower over.  At this stage the petals will all be a bit pointy.  Take a finger or thumb and push the petal into a rounded shape.  It will take a little fiddling and squishing until the fabric wants to sit the way you want it to.  I go around the flower a few times pushing and squishing.


17.  You should now have a lovely little Japanese plum flower.


18.  Bead the centre of the flower how you wish.  I like to put a bead cap or two in and then a bead that will highlight one of the colours in the flower.
19.  Flip the beaded flower over and put some craft glue on the raw edges.  Adhere it to some felt.  Once the glue has dried, stitch the edge of the flower onto the felt to reinforce it.  Trim the felt.
20.  Finally, sew a brooch back on and it’s ready to wear with pride.
Sumber:kimonoreincarnate.blogspot.com

Olah raga pasca melahirkan

Leave a comment

Mengencangkan Payudara

Agar payudara tetap kencang dan bagus paska menyusui, latihlah otot-otot penyangga payudara serta lengan dan bahu Bunda. Latihan teratur juga akan membuat payudra berfungsi lebih baik.

  • Mendorong dinding. Berdirilah dalam posisi mendorong dinding dengan tangan lurus dan kaki terbuka sejauh satu paha satu sama lain. Condongkan tubuh ke depan perlahan-lahan sambil memeluk siku sampai mencium dinding. Lalu dorong tubuh ke posisi semula secara perlahan. Ulangi latihan ini minimal 10 kali. Tarik napas dalam-dalam selagi Anda mencondongkan tubuh ke arah dinding dan keluarkan napas pelan-pelan selagi mengangkat tubuh.
  • Duduk menyangga buku. Duduk tegak pada kursi bersandaran tinggi dengan kedua kaki menempel lantai. Rentangkan kedua lengan lurus ke samping dengan buku yang cukup berat pada masing-masing tangan. Kemudian tekuk siku dan perlahan-lahan bawalah buku-buku ke arah Anda setinggi bahu. Pertahankan selama lima hitungan dan luruskan kembali kedua lengan. Ulangi latihan ini sebanyak lima kali.
  • Mengepalkan tangan. Duduklah bersilang kaki dengan punggung lurus, tekuk lengan di depan dada dengan satu tangan mengepal dan tangan lain menekapnya. Dorongkan satu sama lain sehingga Anda merasakan regangan pada otot-otot dada. Gantilah tangan yang mengepal dan ulangi pada sisi yang lain. Lakukan masing-masing lima kali pada setiap lengan.
  • Membuat lingkaran kecil. Berdiri tegak dengan kaki terbuka berjarak satu bahu dan kedua lengan direntangkan ke samping setinggi bahu. Lemparkan lengan ke belakang, buatlah lingkaran penuh kea rah belakang sebanyak lima kali. Ulangi kea rah yang berlawanan sebanyak lima kali pula.
  • Tekanan tangan. Duduklah bersilang kaki dengan kedua tangan terlipat di depan tubuh setinggi bahu. Tekan kedua tangan satu sama lain sekuat mungkin. Kemudian lepaskan dan rasakan otot-otot pad abagian samping tubuh berkeut dan melamas, ulangi sampi 10 kali

Leave a comment

Red and white christmas ornaments

Older Entries Newer Entries